Saturday, September 29, 2018

Fingering: Part 1

Today’s weekend post focuses on fingering; a topic about which I often write for the reason that I feel it’s particularly important for students of all levels. This article is the first in a two-part series written for the September 2018 edition of Piano Professional, published by EPTA (European Piano Teachers Association), for whom I regularly write a technique feature.


Fruitful Fingering Part 1

Fingering comes in all different guises and there is certainly no ‘one-size-fits-all-approach’; much can depend on the size, shape and disposition of the hand. However, there are certain fundamentals which might be applied to most hands, and with that in mind, some of following suggested techniques will hopefully prove advantageous for all kinds of repertoire. This is the first of two articles examining various fingering strategies and ideas which may be useful for your students.

If you use Urtext editions, fingering will have generally been written in to the score by an editor or in some cases, the composer, but irrespective of who has added the fingering, it’s always possible to change it and replace with your own. As a teacher, I often spend a significant amount of time during lessons either adding or changing fingering, and sometimes fingering may have been drafted in to the score at the very start of the learning process only to be changed after a week or two, if a more suitable one miraculously comes to light.

A crucial factor, when educating our students about the benefits of idiomatic fingering, is the practice and absorption of scales, arpeggios and broken chords. Students and teachers frequently bemoan their existence in exams, but they do serve a myriad of purposes. I have written extensively about the importance of scales as technical exercises, but another, often overlooked, factor is that by assimilating all the scale and arpeggio technical work properly, students learn ideal fingerings for much passage work.

Baroque and Classical repertoire is routinely constructed from standard scale patterns, and therefore it’s both pragmatic and practical to base fingerings for such passages on those learnt from scales. The following is a good example; hailing from the first movement of Beethoven’s Sonata in C minor Op. 10 No. 1, the scale passage in the right hand can be clearly identified as that of E flat major (starting on the third of the scale), and if the same fingerings are employed as in the scale, the passage is that much easier to grasp:

Contrary motion scales prove a useful tool for learning symmetrical playing. If the thumbs or same fingers (in either hand) can play together when moving in the opposite direction, coordination feels comfortable. This won’t always be possible, but when our students are starting to play scales, aim to begin with simpler objectives.

Symmetry is also at work when learning arpeggio patterns. Fingering must be well-defined in arpeggios; the left hand, particularly, relies on the careful use of the third or fourth finger:

In this example, it might seem taxing to use the fourth finger on the E (the second note in the C major arpeggio), but using the third finger here, as suggested in some exam manuals, renders an awkward position for the hand. Eventually, the fourth becomes accustomed to the second note, and this helps with chordal playing too. However, when playing a major third at the start of an arpeggio, such as in D major, the third finger would be ideal:

Encouraging students to learn these patterns accurately from the start is a good plan, as it becomes tricky to change them at a later date. The brain seems hard-wired to play the first fingering pattern it learns – changing always feels alien.

Aim to play in position as much as possible. This involves limiting turning the hand, or changing hand positions. Hand turns can lead to uneven playing, especially when a melodic line is involved. Bumpy or jerky playing can happen when there are too many thumbs on the scene. If students can be coaxed into using their fourth and fifth fingers as frequently as the inner part of their hand i.e. the thumb, second and third fingers, not only will the hand be more balanced whilst playing passage work, but it will also feel more natural, with considerably less movement. In order to do this, the outer fingers will require sufficient practice, so that they are able to cope with the demands of playing crisp passage work. With this in mind, it might be pertinent to use a few daily exercises, but only with the guidance of a teacher, as it’s easy to ‘lock-up’ or become tense without cultivating flexibility in the hand and wrist when working at developing finger strength.

Know your thumbs! Thumbs can be pivotal for secure playing; knowing where they occur in both hands, and where they don’t need to occur, will create confidence. Once students are aware of thumb placement, the other fingers tend to fall in to place. Although thumbs provide stability when playing, as they tend to ‘anchor’ passage work, the challenge is to listen optimally so they do not dominate; they must ideally be tonally equal to all the other fingers, therefore we must strive to find ways to camouflage thumb ‘accents’ which can happen due to thumb physiology.

When writing fingering in the score, it can be enough to pen where thumbs arise, as opposed to marking every finger, but I still tend to write in much more fingering than this for my students. If possible, try to ensure that hands work in tandem; occasionally what seems like the best fingering in the right hand might become unworkable when both hands play together.

Repeated patterns or sequences can be an excellent way to absorb fingering quickly. Sequences of notes or note patterns may lend themselves to replica or repeated fingering i.e. the same patterns over and over again. Repetition is key here, and the ‘blocking-out’ technique can prove a suitable method of learning i.e. playing note patterns all together in one go, enabling pupils to find the notes and their corresponding fingerings at once. This can be seen in the following example, which shows two bars from the first movement of Beethoven’s Sonata in C minor Op. 10 No. 1. The first example illustrates how the Alberti Bass pattern in the left hand appears in the score, and the second, how it might be practised (keeping the same fingering throughout):

Further to the second example, for even swifter learning, the entire bar could be played as one or two chords (where possible).

Repeated notes are a different fingering issue altogether. There are often two schools of thought; some believe it’s better to change fingers on every note during a repeated note passage, whilst others find using the same finger achieves a more pleasing result. I encourage students to try both methods, and decide for themselves. Let’s examine the following passage, which is the opening of Turina’s Fiesta Op. 52 No. 7, right hand:

Both fingerings are acceptable. By using the same finger, or the top fingering in the example, you may find that students are able to create a smoother, more even repeated note passage. For clarity and control, advocate keeping the second finger close to the keys and employ a gentle finger tapping movement.

Finger substitution is a preferred method of playing legato. It’s too easy to rely on the sustaining pedal to ‘join’ note passages. If a pianist can continually substitute or change fingers on one and the same note, fluent, smooth playing should be the happy result. Finger substitution entails holding a key down with one finger whilst quickly swapping to another finger or thumb, ensuring the same note is held for the entire procedure. This technique enables pianists to form an unbroken musical line whilst playing other note figurations or patterns underneath (or above).

Finger sliding utilizes the same finger to literally ‘slide’ from note to note. I call this the ‘illusion of legato’ and it may also be a useful technique for larger intervals too; notes don’t actually need to be next to each other to benefit from the sliding approach.

Sliding requires a very smooth manoeuvre, where the second note of any ‘slide’ must not only match the sound to that of the dying first note, but should also aim to avoid gaps in the sound between notes. Astute listening is paramount.  Students might like to work at the following exercise. After practising this exercise using the thumb, play it with the second finger, and then third finger:

Fingering is of utmost importance when learning to play smoothly, evenly and proficiently. It’s for this reason that we must offer our students a thorough grounding, so that they are eventually able to annotate scores for themselves.

Click on the link below to read the original article:

Fruitful Fingering Part 1


My Publications:

For much more information about how to practice piano repertoire, take a look at my two-book piano course, Play it again: PIANO (Schott). Covering a huge array of styles and genres, 49 progressive pieces from approximately Grade 1 – 8 level are featured, with at least two pages of practice tips for every piece. A convenient and beneficial course for students of any age, with or without a teacher, and it can also be used alongside piano examination syllabuses too.

You can find out more about my other piano publications and compositions here.


from Melanie Spanswick https://ift.tt/2QnY2s3

Arnold Palmer At The Ryder Cup – 1973

The 1973 Ryder Cup marked Arnold Palmer’s final appearance as a Ryder Cup player. Palmer ... Read more.

The post Arnold Palmer At The Ryder Cup – 1973 appeared first on GolfBlogger Golf Blog.


from GolfBlogger Golf Blog https://ift.tt/2R6I3zL

Friday, September 28, 2018

Final 16 in Michigan PGA Section Match Play Championship Meet at Eagle Eye Golf Club

BATH – The Michigan PGA Section Match Play Championship presented by the PGA Tour will ... Read more.

The post Final 16 in Michigan PGA Section Match Play Championship Meet at Eagle Eye Golf Club appeared first on GolfBlogger Golf Blog.


from GolfBlogger Golf Blog https://ift.tt/2xIkdCk

All Time Ryder Cup Dream Team – US Edition

Who would be on the All Time Ryder Cup Dream Team for the United States? ... Read more.

The post All Time Ryder Cup Dream Team – US Edition appeared first on GolfBlogger Golf Blog.


from GolfBlogger Golf Blog https://ift.tt/2NNAFeA

Thursday, September 27, 2018

Explaining Foursomes – Ryder Cup Edition

With the Ryder Cup here, here’s a primer on the Foursomes game: While the proper ... Read more.

The post Explaining Foursomes – Ryder Cup Edition appeared first on GolfBlogger Golf Blog.


from GolfBlogger Golf Blog https://ift.tt/2R5gCGy

Explaining Four Ball – Ryder Cup Edition

Ryder Cup matches consist of Four Ball, Foursomes and Individual match play. One of the ... Read more.

The post Explaining Four Ball – Ryder Cup Edition appeared first on GolfBlogger Golf Blog.


from GolfBlogger Golf Blog https://ift.tt/2NJTj6N

Odds To Win The Ryder Cup

On the eve of the 2018 edition, here are the current odds to win the ... Read more.

The post Odds To Win The Ryder Cup appeared first on GolfBlogger Golf Blog.


from GolfBlogger Golf Blog https://ift.tt/2Ofpnip

Ryder Cup Perfect Pairs

The Betway Blog offers this historical analysis of European and US Ryder Cup Pairings. EUROPE ... Read more.

The post Ryder Cup Perfect Pairs appeared first on GolfBlogger Golf Blog.


from GolfBlogger Golf Blog https://ift.tt/2NH2SDA

REtipster Just Got a HUGE Makeover! Come Explore the New Site!

For the past six months, I have invested a huge amount of time and money into a complete overhaul of REtipster.com.

In a lot of ways, I had been feeling like the site wasn't doing the best job of delivering the content in a way that made it easy for users to find what they were looking for.

For example, if I wrote a blog post back in 2013 and the content was still every bit as relevant then as it is today, my old website design didn't make it easy for people to find that. With the various WordPress themes and basic WordPress functionality I was using, it just wasn't possible.

There were other issues my site was dealing with too. Pages were loading slower than they should, things would periodically break when WordPress would make updates, and when I wanted to make small tweaks to the look and feel of my site, it took some serious heavy lifting.

Earlier this year, I had the good fortune of meeting a blogger from Toronto named Richard Lazazzera. He runs a website with a similar sized audience called ABetterLemonadeStand.com – and aside from the fact that his blog serves a completely different audience, I noticed a lot of parallels between his site and mine.

He told me about a company he had used to overhaul his website called Pixel Dreams. His site was VERY sharp, and I wanted mine to be on a similar level. I knew the content and value was there, but the design, functionality, and layout definitely weren't, so I decided to enlist the help of Pixel Dreams to give REtipster.com a much-needed tune-up.

As you can see from the end result of their work, these guys are good.

Their task wasn't simply to create a custom WordPress theme, but also to:

  • Clarify the message of REtipster.com
  • Make the site function seamlessly from end-to-end
  • Give the REtipster brand a much more mainstream look and feel
  • Make it easy for people to find the most relevant information that matters to them

(There was a lot of other work that went into the overall project as well, but you get the idea.)

In this video, I'll give you a quick tour of what the site looks like today, and how you can use some of its new functionality:

As you can see, the website has come a LONG way since its humble beginnings back in 2012. I hope you find these updates helpful, and I hope you'll continue to let me know what kind of functionality and features you'd like to see us offer.

With any luck – we'll be able to keep this website on the cutting edge and help you grow your real estate investing business in the process.

The post REtipster Just Got a HUGE Makeover! Come Explore the New Site! appeared first on REtipster.


from REtipster https://ift.tt/2NKy3OA

Wednesday, September 26, 2018

Arcadia Bluffs Vista

I recently had the chance to play Arcadia Bluffs. It is an amazing course — ... Read more.

The post Arcadia Bluffs Vista appeared first on GolfBlogger Golf Blog.


from GolfBlogger Golf Blog https://ift.tt/2xU2E1d

Tony Jacklin At The 1989 Ryder Cup

Tony Jacklin 1989 Ryder Cup For just the second time in Ryder Cup history, the ... Read more.

The post Tony Jacklin At The 1989 Ryder Cup appeared first on GolfBlogger Golf Blog.


from GolfBlogger Golf Blog https://ift.tt/2zwTqdq

Quick Notes On The Ryder Cup

Who Will Win the Tournament? The rest of the world may be going World Cup ... Read more.

The post Quick Notes On The Ryder Cup appeared first on GolfBlogger Golf Blog.


from GolfBlogger Golf Blog https://ift.tt/2ONNlyd

Dai Rees Putting At The 1937 Ryder Cup

Dai Rees At The 1937 Ryder Cup Welsh golfer Dai Rees played in a total ... Read more.

The post Dai Rees Putting At The 1937 Ryder Cup appeared first on GolfBlogger Golf Blog.


from GolfBlogger Golf Blog https://ift.tt/2DwvHy3

Match Play Explanation – Ryder Cup Edition

The Ryder Cup is here, and with it the semi-annual confusion of casual golf fans ... Read more.

The post Match Play Explanation – Ryder Cup Edition appeared first on GolfBlogger Golf Blog.


from GolfBlogger Golf Blog https://ift.tt/2Qaw7eS

Walter Hagen Accepts The 1937 Ryder Cup Trophy

Walter Hagen Accepts The 1937 Ryder Cup Trophy The 1937 Ryder Cup was the last ... Read more.

The post Walter Hagen Accepts The 1937 Ryder Cup Trophy appeared first on GolfBlogger Golf Blog.


from GolfBlogger Golf Blog https://ift.tt/2xDnDX0

Tuesday, September 25, 2018

Firing Up The Flux Capacitor One Last Time

Yesterday, by way of recovering from Sunday's massive cylocrossing effort, I took a leisurely spin on a fat-tired bicycle:


As you can see from the willows in the distance, the wind was blowing, and now that the temperatures are trending downward for autumn it's far easier to forsake the Lycra without sweating through your clothes and looking like you've wet your pants.

Alas, today it is raining steadily and heavily, so instead of riding I retreated to the basement where I finally got around to packing up the Drysdale Special for its return journey to Classic Cycles on Bainbridge Island, WA:


While technically my last ride on this bike was last week when my son and I rolled on over to the park, my last "proper" ride (meaning with the ballet shoes and so forth) was to Central Park last weekend:


In my 11-ish years of typing words into this electronic box a lot of bicycles have passed between my legs, but the Drysdale stands out--mostly because it's old as shit, to be fair, but also because the experience of riding and old-as-shit bicycle is nothing short of revelatory inasmuch as by 1950 the road racing bicycle had already attained a state of considerable awesomeness:


Indeed, I will now acutely feel the absence of a vintage bicycle in my stable, and I've now got half a mind to put one together for myself.  (Though fortunately I've got another half a mind to save the time and energy and not bother.)  I'm also grateful to have had extensive firsthand experience with landmark bicycle componentry such as the Campagnolo Gran Sport derailleur, with which the Drysdale is equipped:


I do sort of regret racing the bike, and I did consider it.  However, the reason I ultimately decided not to was because, well, it's fucking old, and I didn't want to be the fucking asshole who crashes half the field because his 60+ year-old crankarm snapped.

Anyway, I imagine it won't be my last spin back in time, as Classic Cycles have already indicated I may be in line for a vintage mountain bike next.

Guess I'd better shake out the jorts and grow myself a mustache.

from Bike Snob NYC https://ift.tt/2QWT7iE

Kayaking in Antarctica: Everything You Need to Know

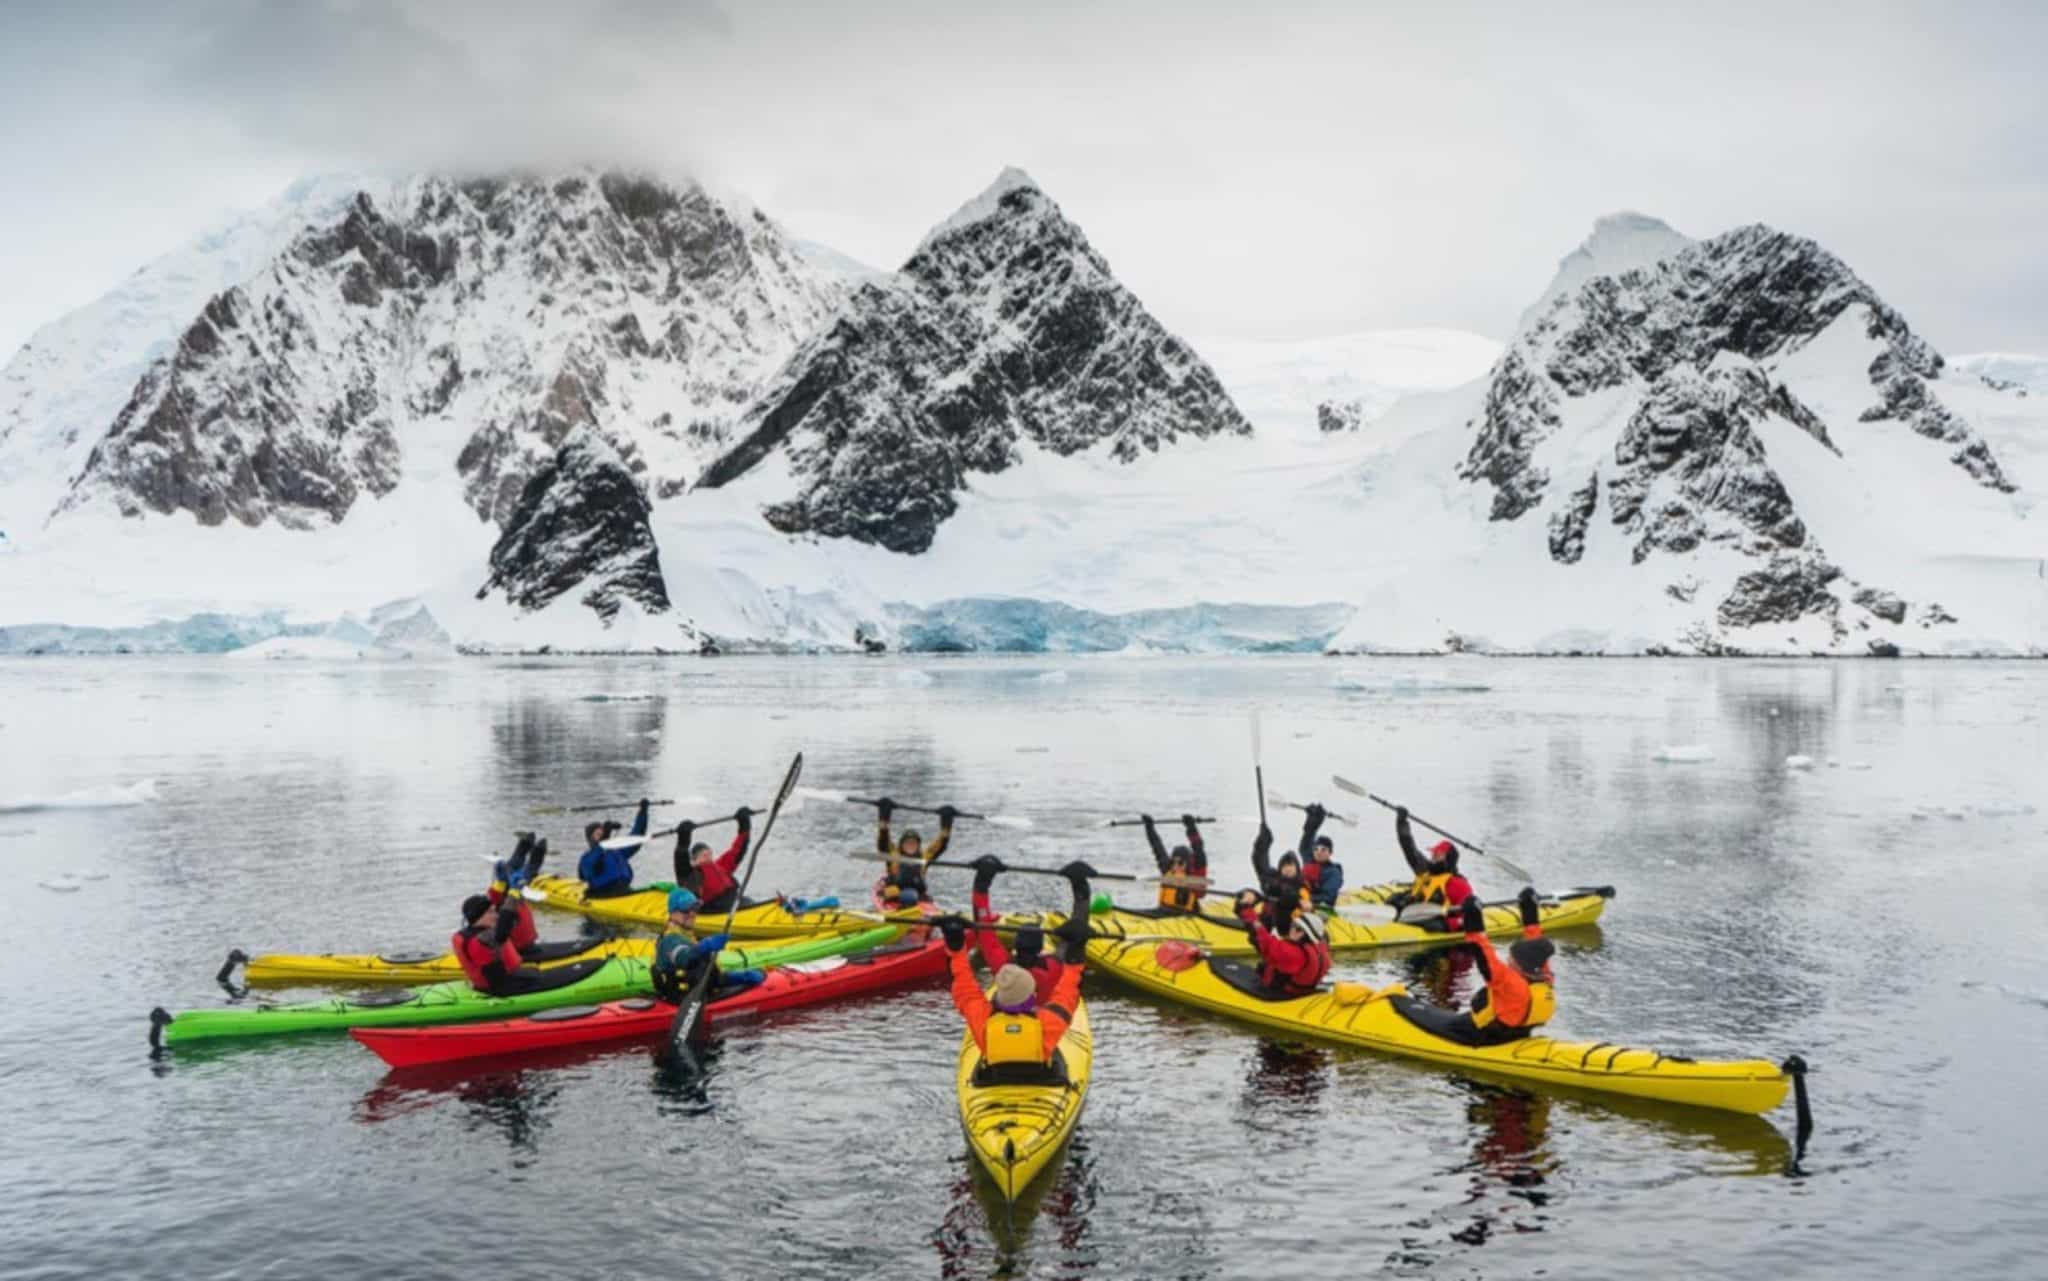
Kayaking in Antarctica is one of the most badass, unique, and special things I’ve ever done while traveling. Antarctica is wild, moving, and breathtaking, and there’s no better way to experience the continent than as close to the water as possible.

I traveled to Antarctica with Quark Expeditions, who sponsored my trip, in March 2018. Quark offers lots of excursions to fill out your expedition: camping, cross-country skiing, stand-up paddleboarding.

But kayaking? Kayaking is the big one, the special one, the one that people rave about.

It’s also very expensive.

How much does kayaking in Antarctica cost? Quark Expeditions charges $995 for the 2018-2019 season. Other companies charge fees in that neighborhood.

In other words, this isn’t an impulse purchase — you should only kayak if you really want to.

But is it worth it? I absolutely think that it is.

What’s it like to kayak in Antarctica? Myths vs. Reality.

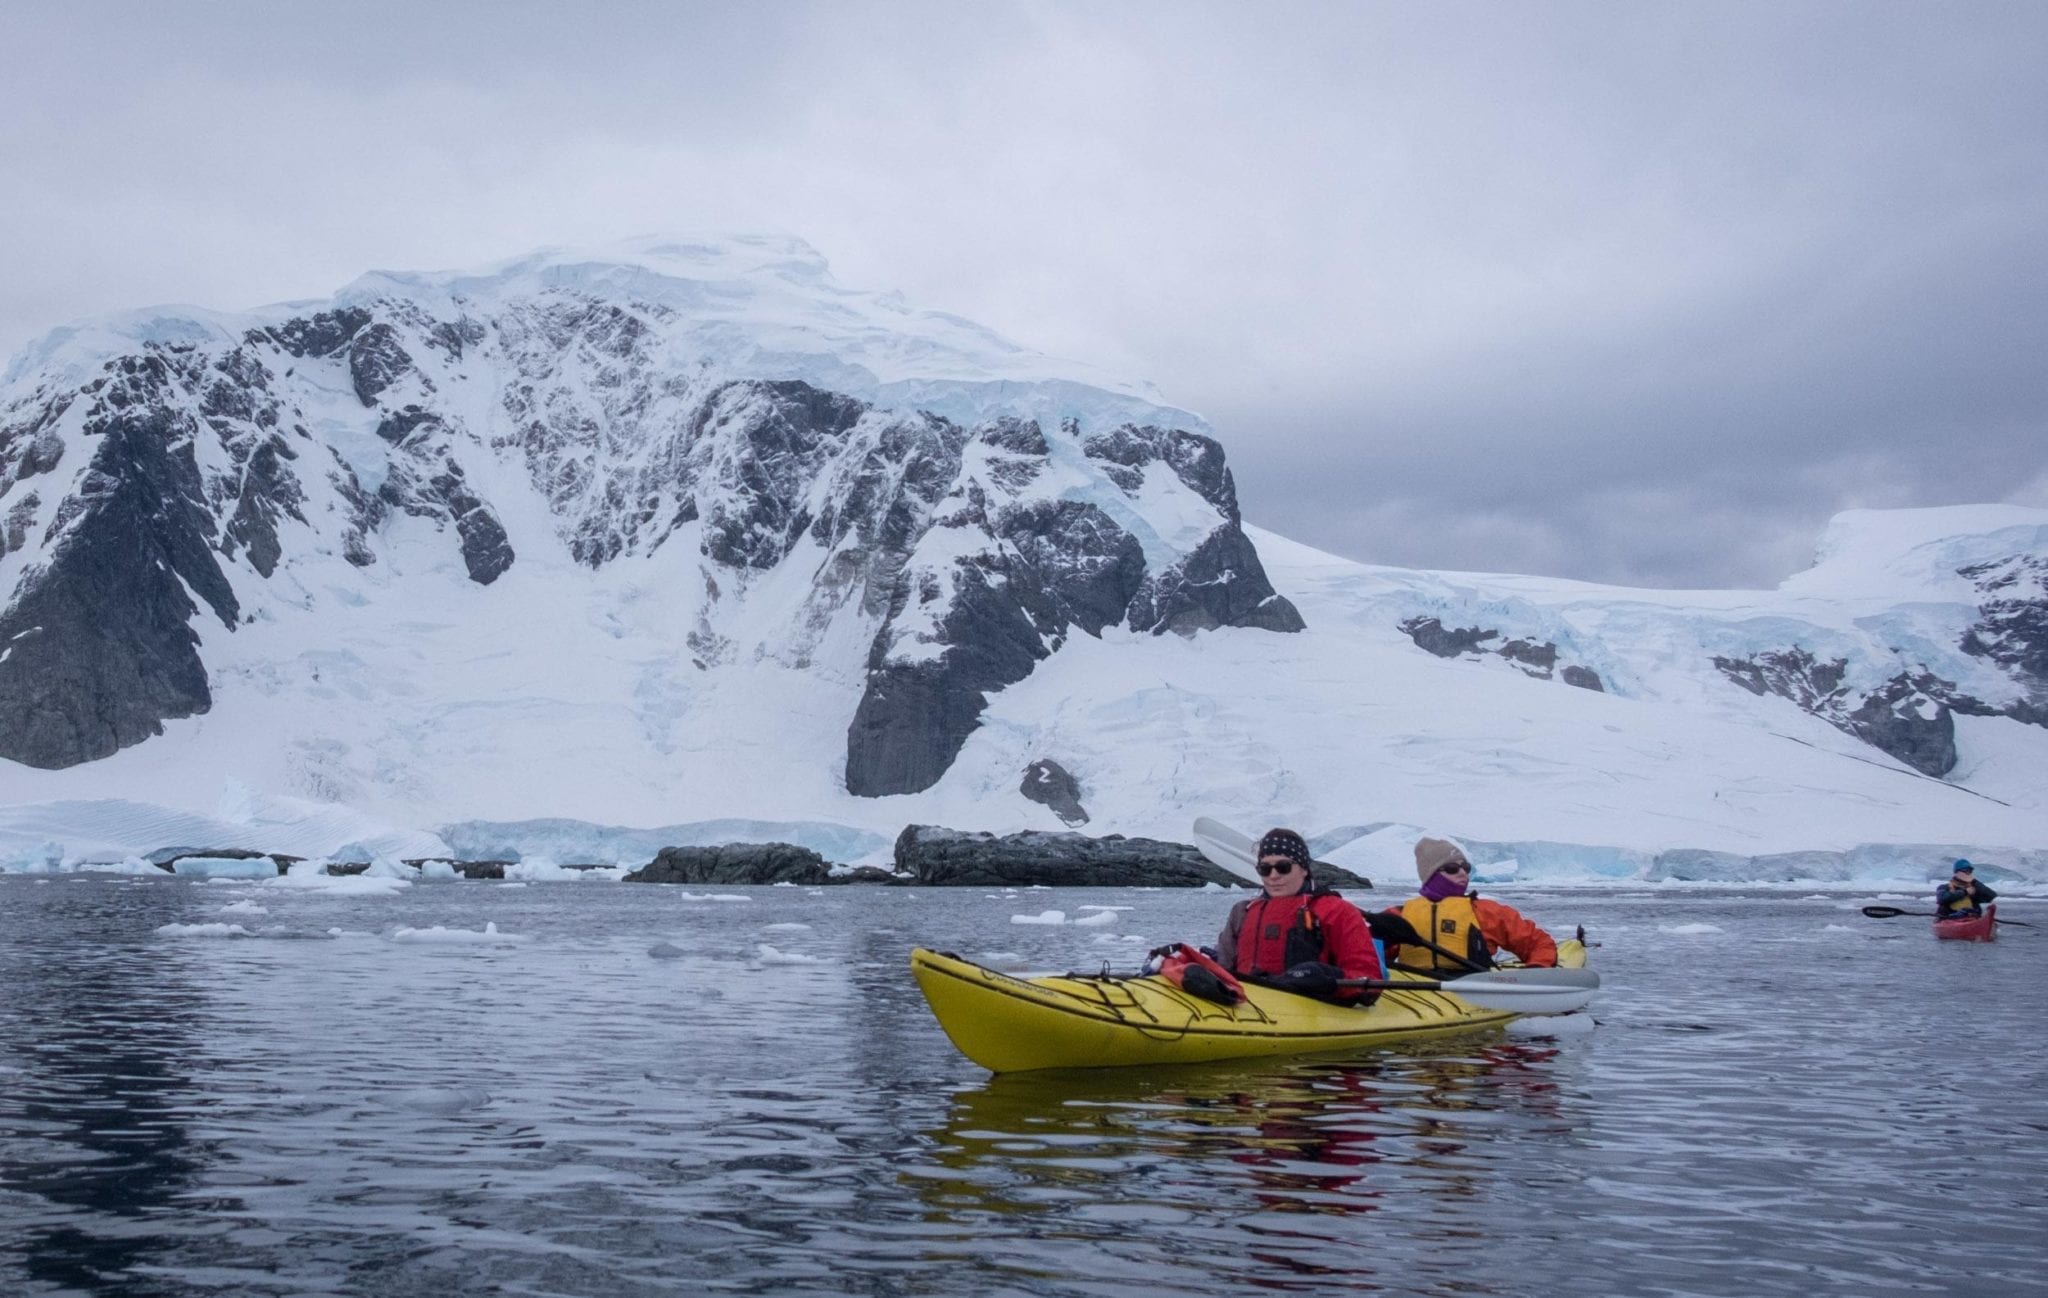
When you choose to be part of the kayaking team in Antarctica, you’re going to be part of a small team that breaks off from the main group and paddles together as often as possible. You have a different experience from everyone else on the ship. Everyone else splits their excursions between zodiac cruises and landings on shore; as kayakers, you go out for a long paddle, then often a shorter landing on shore.

That’s both a good thing and a bad thing: you get to be close

Here are the myths and realities about the Antarctica kayak experience:

You don’t need to be a super athlete in order to kayak in Antarctica. I wouldn’t say that at all — but you definitely need to be somewhat in shape and have a basic level of fitness.

The waves aren’t high or scary at all. Most of our kayaking experiences were on smooth, nearly glassy waters. I’ve gone sea kayaking in many places rougher than Antarctica, and you don’t go out at all if the waves are too high or if the weather is rough.

You go kayaking whenever humanly possible. This isn’t a casual activity that you do once or twice — kayaking is the center of everything you do. Our group ended up going out kayaking eight times. Of course, how often you go out is entirely dependent on the conditions. If you don’t go out, you join the rest of the travelers on zodiacs and on shore.

The guides are there to help you. Our guides were Michael and Vickie, both French Canadians. You don’t be come an Antarctica kayaking guide if you’re not crazy about the polar regions! The guides let you do your own thing but they’re there for you if you need help.

It’s pretty rare for someone to fall in. It happened once on our trip. Steve was pretty good-natured about it. “Well, we did a polar plunge south of the Antarctic Circle, so I might as well do one north of the Antarctic Circle!”

And if it happens to you, you do your wet exit (more on that below), the guides will get you out, and you can either choose to stay out and kayak or have the driver take you back to the boat.

Reasons to Kayak in Antarctica

It’s a beautiful way to be close to nature. When you kayak, you can reach down and touch the water. You can grab a piece of ice from the water and suck on it, feeling the air bubbles pop in your mouth. You can watch penguins, seals, and whales glide through the water just inches from you.

It’s a great way to stay active. You’re going to be on an expedition for at least ten days — it’s easy to turn into a lazy slug. While there was a tiny fitness center on board the Ocean Diamond, it was extremely basic and I didn’t feel the urge to work out there. Also, the food on board is excellent and you’ll probably be eating a ton of it, and it’s good to have an option to work it off.

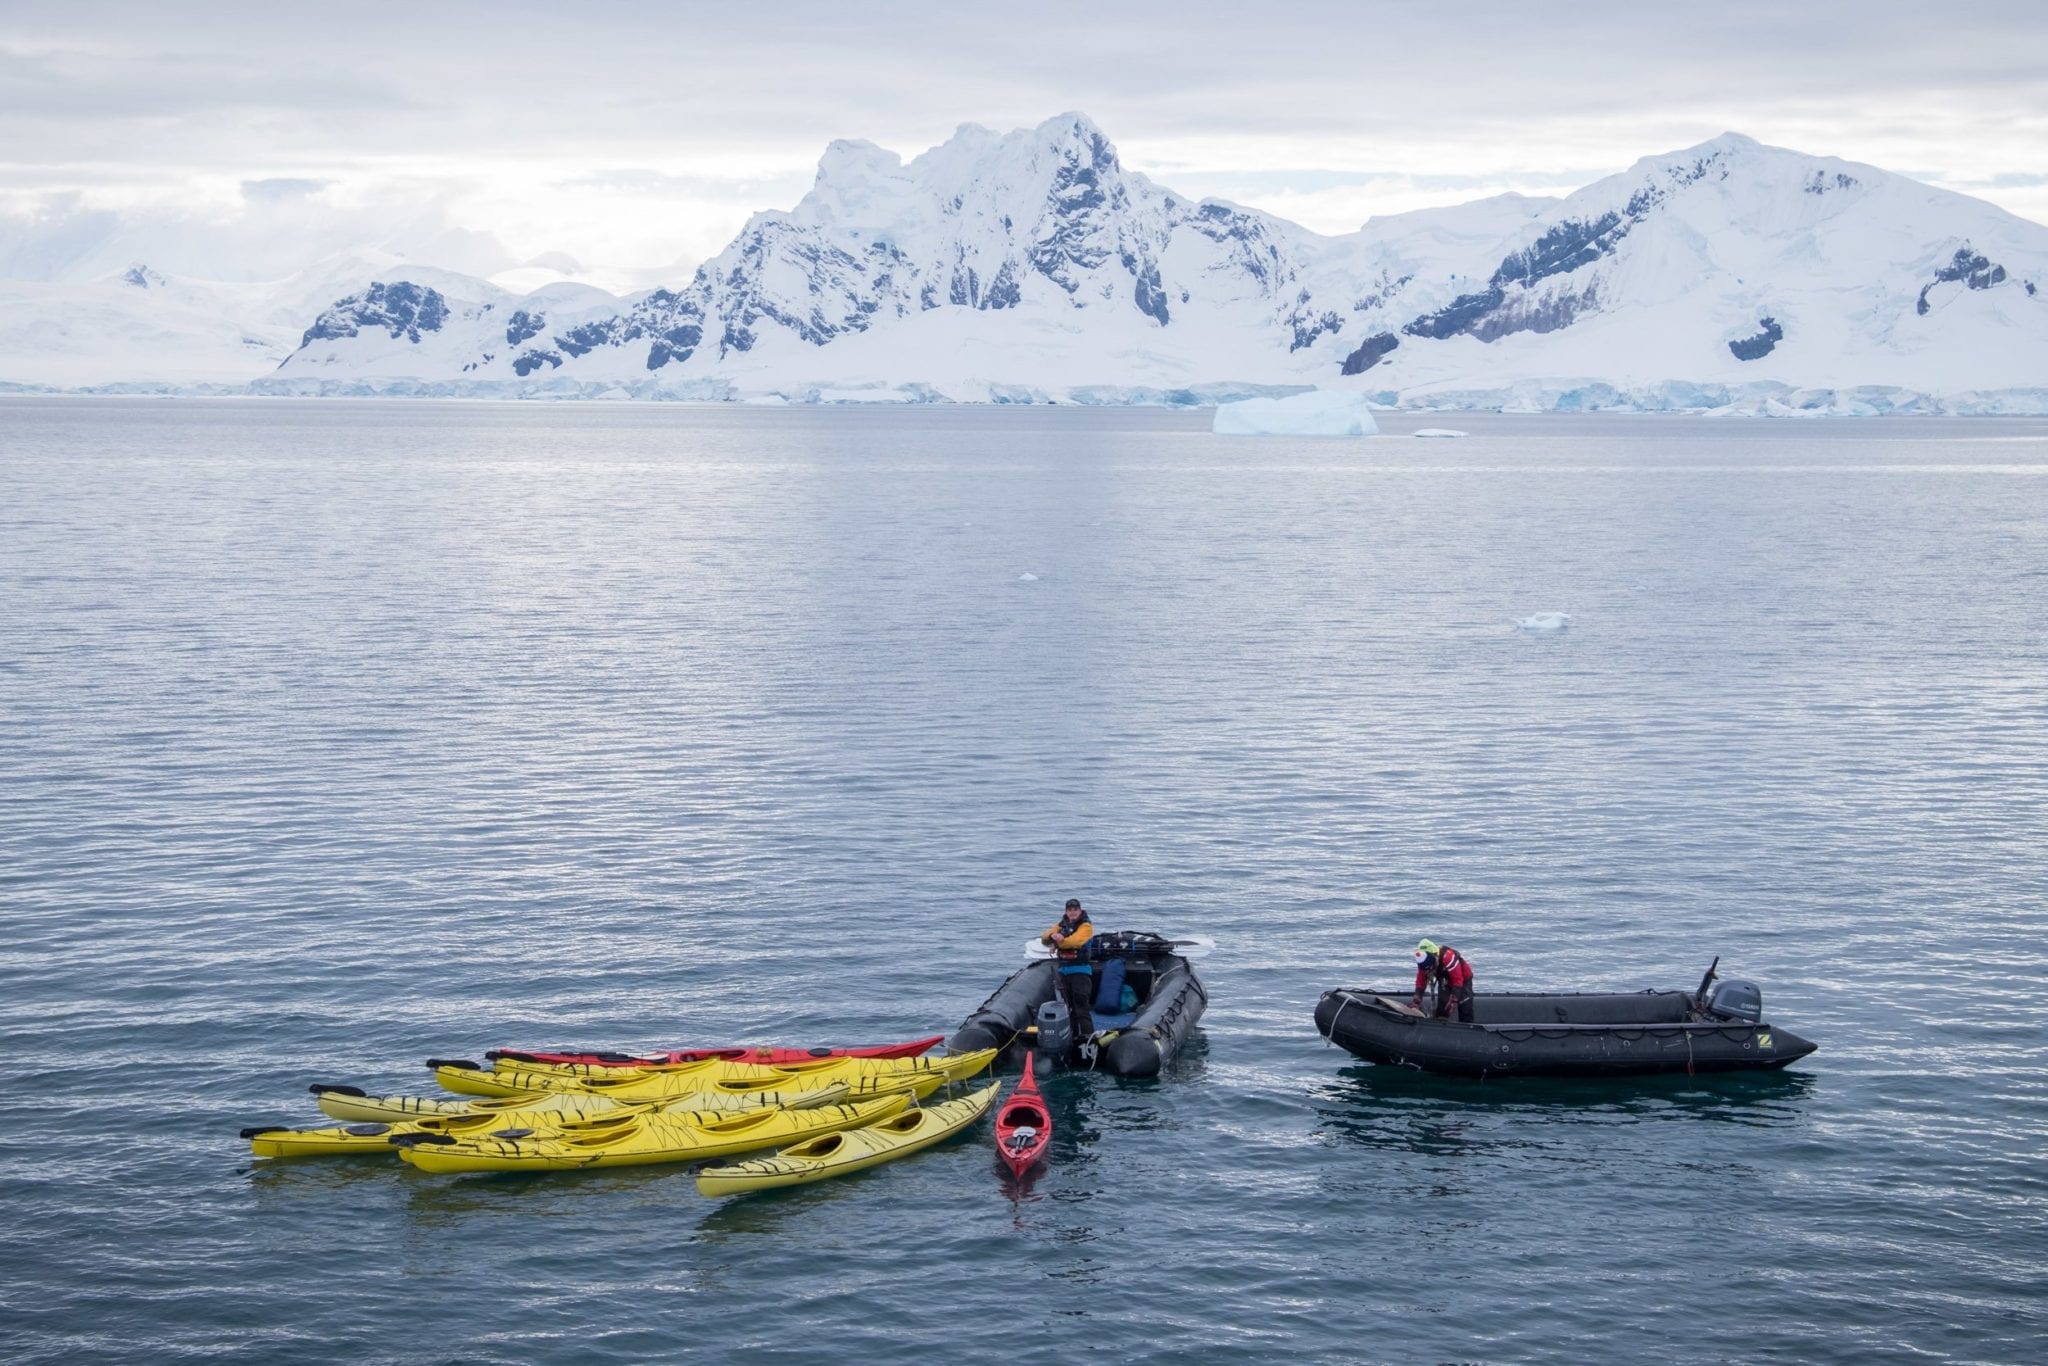
The camaraderie is amazing. The kayakers are a small group of 16 within the expedition of 200, and you really bond with each other. The other people on the ship don’t get that because different people end up in the zodiac each time.

Bragging rights. If you kayak in Antarctica, that’s a pretty badass thing to put on your travel resume.

You feel Antarctica more closely this way. Antarctica is such a moving destination. I threw my soul into writing about it but nothing will ever come close to describing the feeling accurately. When you’re in that environment, it’s so much nicer to be sitting quietly in the water, feeling the chilly droplets fly off the paddle and land on your face.

Reasons Not to Kayak in Antarctica

It really impedes your photography. I’m not going to lie — as a photographer, this is one of the worst things you can do for your work. It nearly killed me that I was missing out on so many photography opportunities.

Why is this? First off, stability. If you’re in a boat, you’re bobbing up and down and it’s hard to get a stable image, especially if you’re shooting from far away.

And secondly, kayaks aren’t designed to be used with fancy cameras. Every time I took my camera out of the dry bag, I felt like I was taking my life into my hands. I would barely shoot and then put it back in my bag, my heart thudding. And that’s when I had a few moments to put the paddle down in the first place.

See further below for tips on how to get the most out of your photography while kayaking.

You can’t kayak casually — you make a commitment for the whole trip. And that’s a big, long-term commitment. A lot of people aren’t up for that much physical activity each day; you may end up tired and regretting it.

You might not see as much quality wildlife. When you’re in the zodiac, your driver guns the motor whenever there’s an amazing wildlife sighting. Kayaking? That just doesn’t happen. You do see wildlife, but it’s more about being in the water and appreciating the nature around you.

You might feel isolated from the other guests. There really is a divide between the kayakers and everyone else. Everyone’s friendly and lovely, of course, but you may feel like you’re missing out.

Best of Both Worlds: Kayak for a Day

Starting in the 2018-2019 Antarctica season, Quark Expeditions will now offer a “paddling excursion,” a.k.a. “kayak for a day.” This is a perfect solution for someone who wants to try Antarctica kayaking but doesn’t want to commit to being a hardcore kayaker.

Michael told us that he was initially skeptical about the idea of inflatable kayaks, but once they tried them out, he was sold. They’re big, they’re extraordinarily difficult to tip over, and they’re made of the same durable rubber as the zodiacs. Perfect for beginners.

Best of all? It’s much cheaper. Currently a paddling excursion costs $225 rather than the $995 of kayaking on the whole Antarctica trip.

I’m really happy to hear of this new activity — it seems like it would be the perfect solution for lots of people.

Tips for Kayaking in Antarctica:

Protect your fingers and toes from the cold. This is perhaps my single most important tip: you will be ABSOLUTELY MISERABLE if you have cold fingers and toes.

For your hands, spend big money on the absolute best gloves or mittens you can find (these are good ones), and glove liners or running gloves underneath. Wear Hot Hands hand warmers in between your gloves or mittens and the liners. For your feet, wear sock liners, thick socks, and more Hot Hands hand warmers in between the liners and the socks.

Base layers are also extremely important. Many people swear by Icebreaker merino wool tops and leggings; I tried them but actually preferred the much cheaper Uniqlo base layer top and leggings.

Quark provides all the vital kayaking gear: the drysuit, booties, kayaking skirt, life vest, drybags, and of course the kayaks and paddles themselves. And if you need better gear, you can buy from the shop on board.


READ MORE: Antarctica Packing List


Get yourself in reasonably good shape before you go. You don’t have to be a marathoner, but at least go for long walks on a regular basis and be able to climb a few flights of stairs without having to stop.

Take your boots on the zodiac for landings. You wear booties that you zip over your drysuit while kayaking, but they’re not fun for landings — your feet can get very cold. On days when you’re kayaking and doing a landing afterward, I recommend bringing your boots, leaving them in the zodiac while you kayak, and changing into them before you land. So much more comfortable.

Hydrate. Antarctica can be very dry and you’re physically exerting yourself. Quark provides a bag-like water bottle, but I didn’t like how floppy it was — I recommend bringing a reusable aluminum bottle with a cantilever to connect it to the ropes on your kayak.

Learn how to do a wet exit. This is a requirement in advance. Look into classes around your neck of the woods. You don’t necessarily have to commit to a course, though of course it will be helpful — you can always ask the instructor if he or she would be willing to teach you to do a wet exit independently.

Consider a GoPro. If you don’t want to knock yourself out trying to get top-quality photos, just throw a GoPro on yourself with a head strap or chest strap and set it to shoot continuously. That way you can kayak to your heart’s content without stopping to take photos.

Should Photographers Kayak in Antarctica?

Honestly, if you’re a photographer and you want to kayak, you’re going to be making sacrifices on both ends. It’s nearly impossible to do both well. You’ll be impeding both your kayaking experience and your photography experience.

That said, it can be done. I have some tips.

Talk to your guides about your photography priorities and considering sitting out kayaking on the best photography day. While Antartica itineraries change on a whim, as soon as we learned we’d be visiting Cuverville Island, the guides told us that this would be the absolute best day for hanging out with penguins.

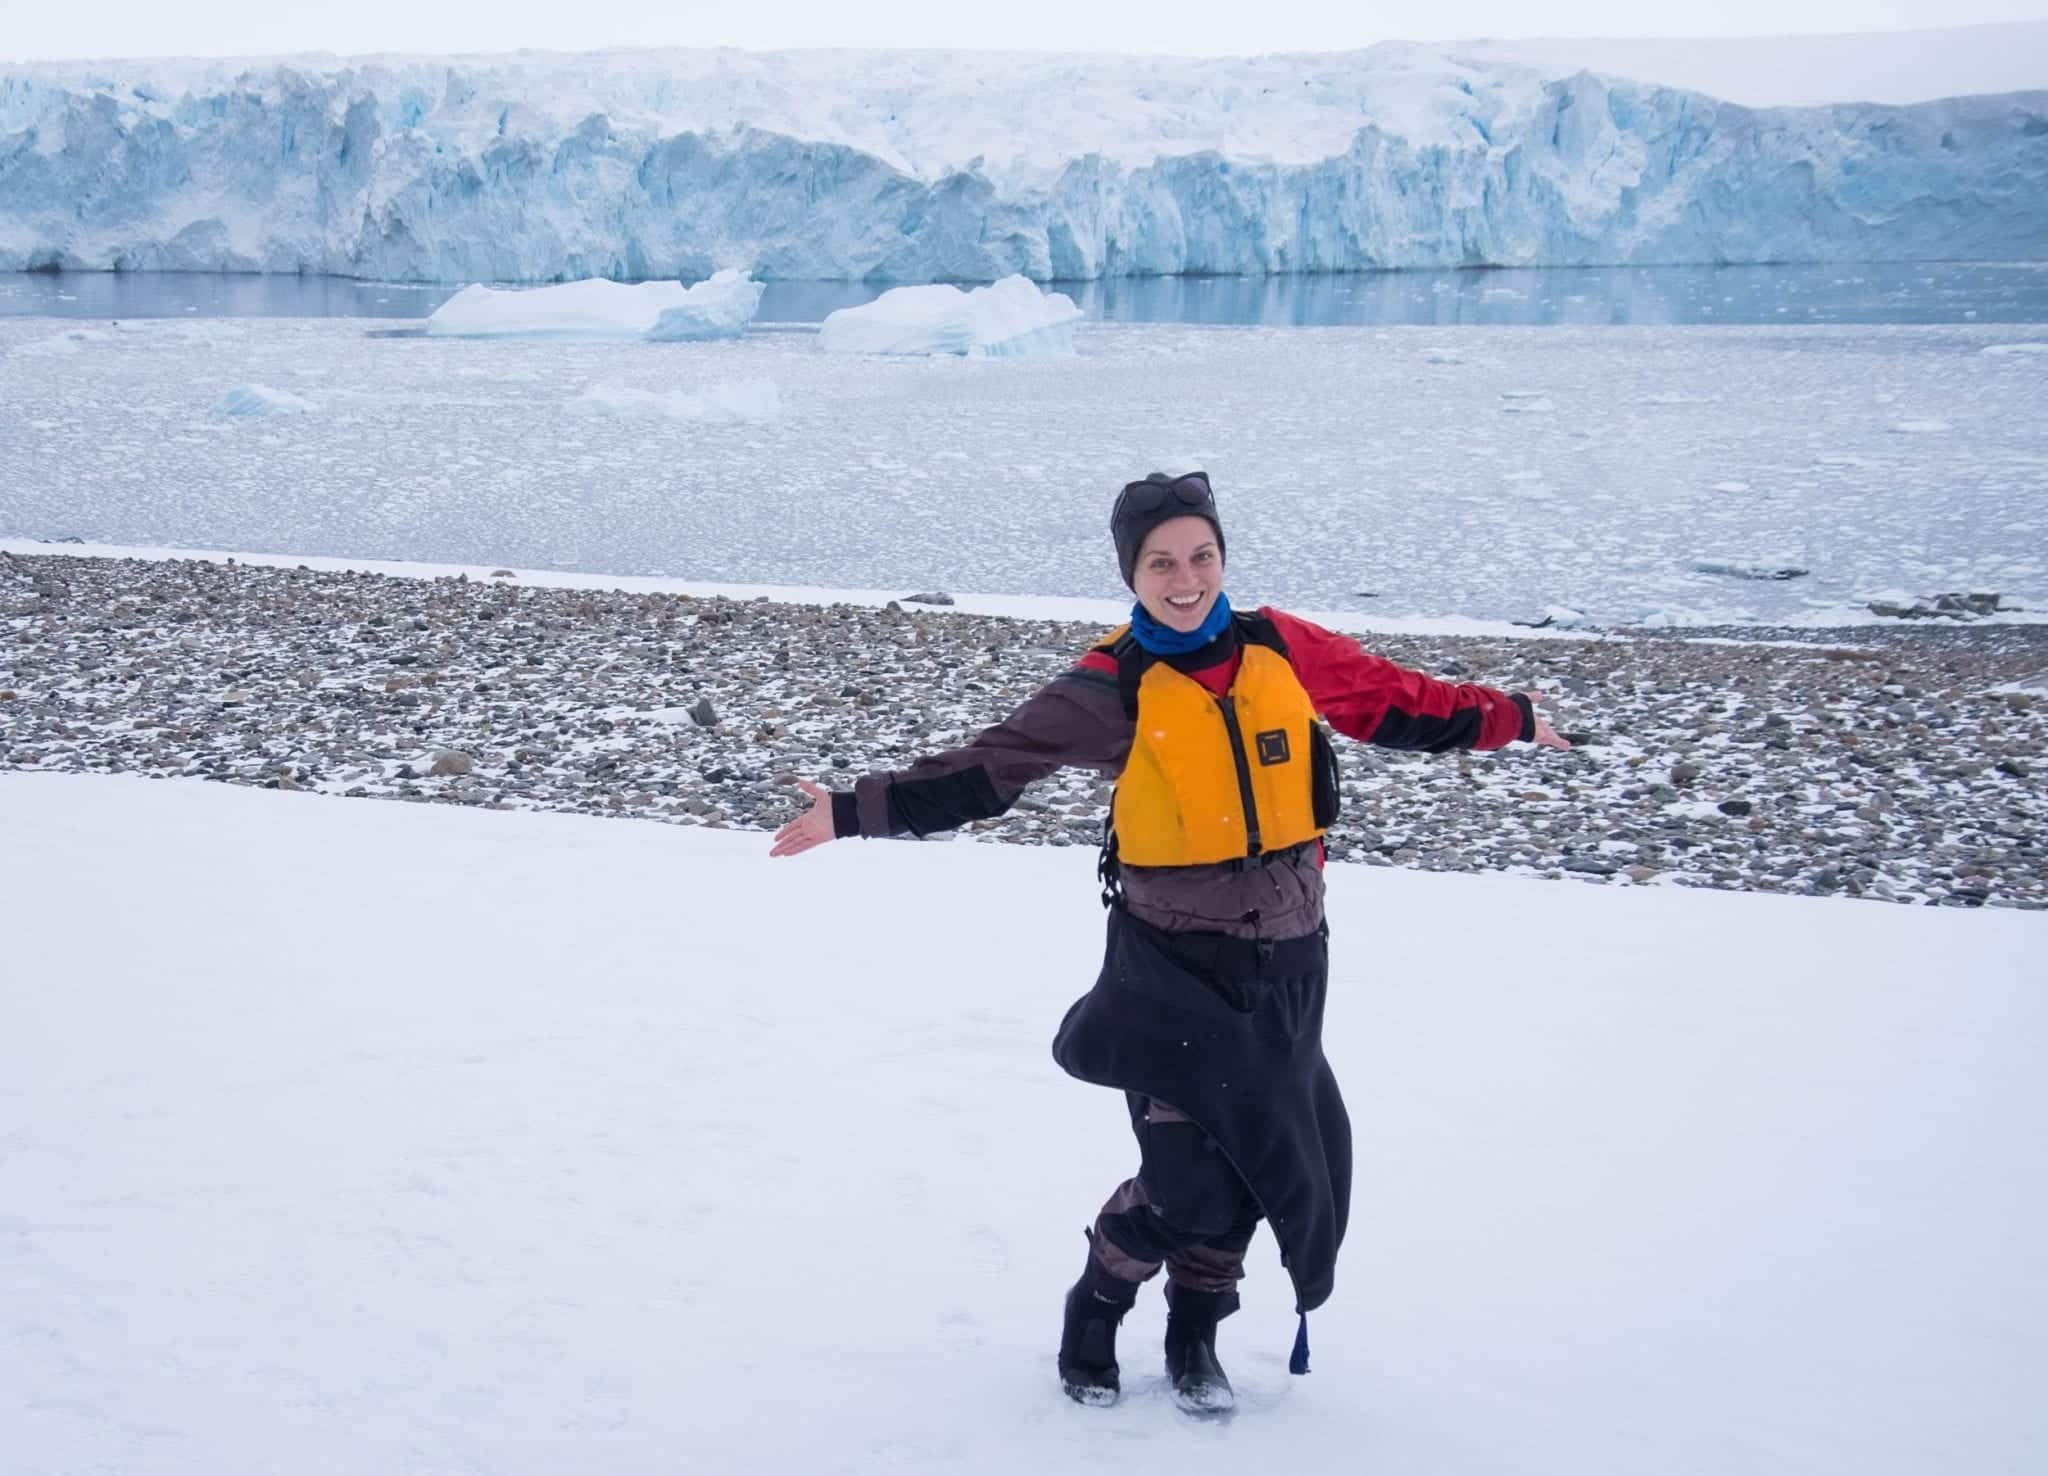
I chose not to kayak that day, as did a few other kayakers, and it was absolutely the right decision. I spent this day getting all the penguin photos and me-with-penguins photos in my yellow Quark jacket and blue pants.

Keep this in mind if you want to get good photos of yourself in Antarctica. The drysuits are functional but they look so goofy in photos!

Plan to pair up and be in a double kayak. First off, you could take your DSLR or big camera with you and put it in a dry bag, but the guides urged people with big cameras to only use the double kayaks, as the weight could make the single kayaks prone to capsizing.

Luckily I got paired up with my friend Brian on the first day and we became great kayaking partners. He didn’t mind my photo-taking at all — or if he did, he didn’t tell me! Even so, I tried not to take advantage and kept my photography to a minimum.

Best case scenario is if you’re traveling with your partner, you share a kayak with your partner, and your partner does the lion’s share of the kayaking while you do all of the photography. And it’s optimal if the photographer is the lighter person and sits in the front of the kayak.

Would I kayak again, knowing that I was screwing myself out of photography opportunities? Yes, I would. For me, the kayaking experience was so incredible it made up for me not getting the photos I wanted.

My Favorite Kayaking Spots in Antarctica

Every kayak spot in Antarctica has something special to offer. But for me, there were three that stood out:

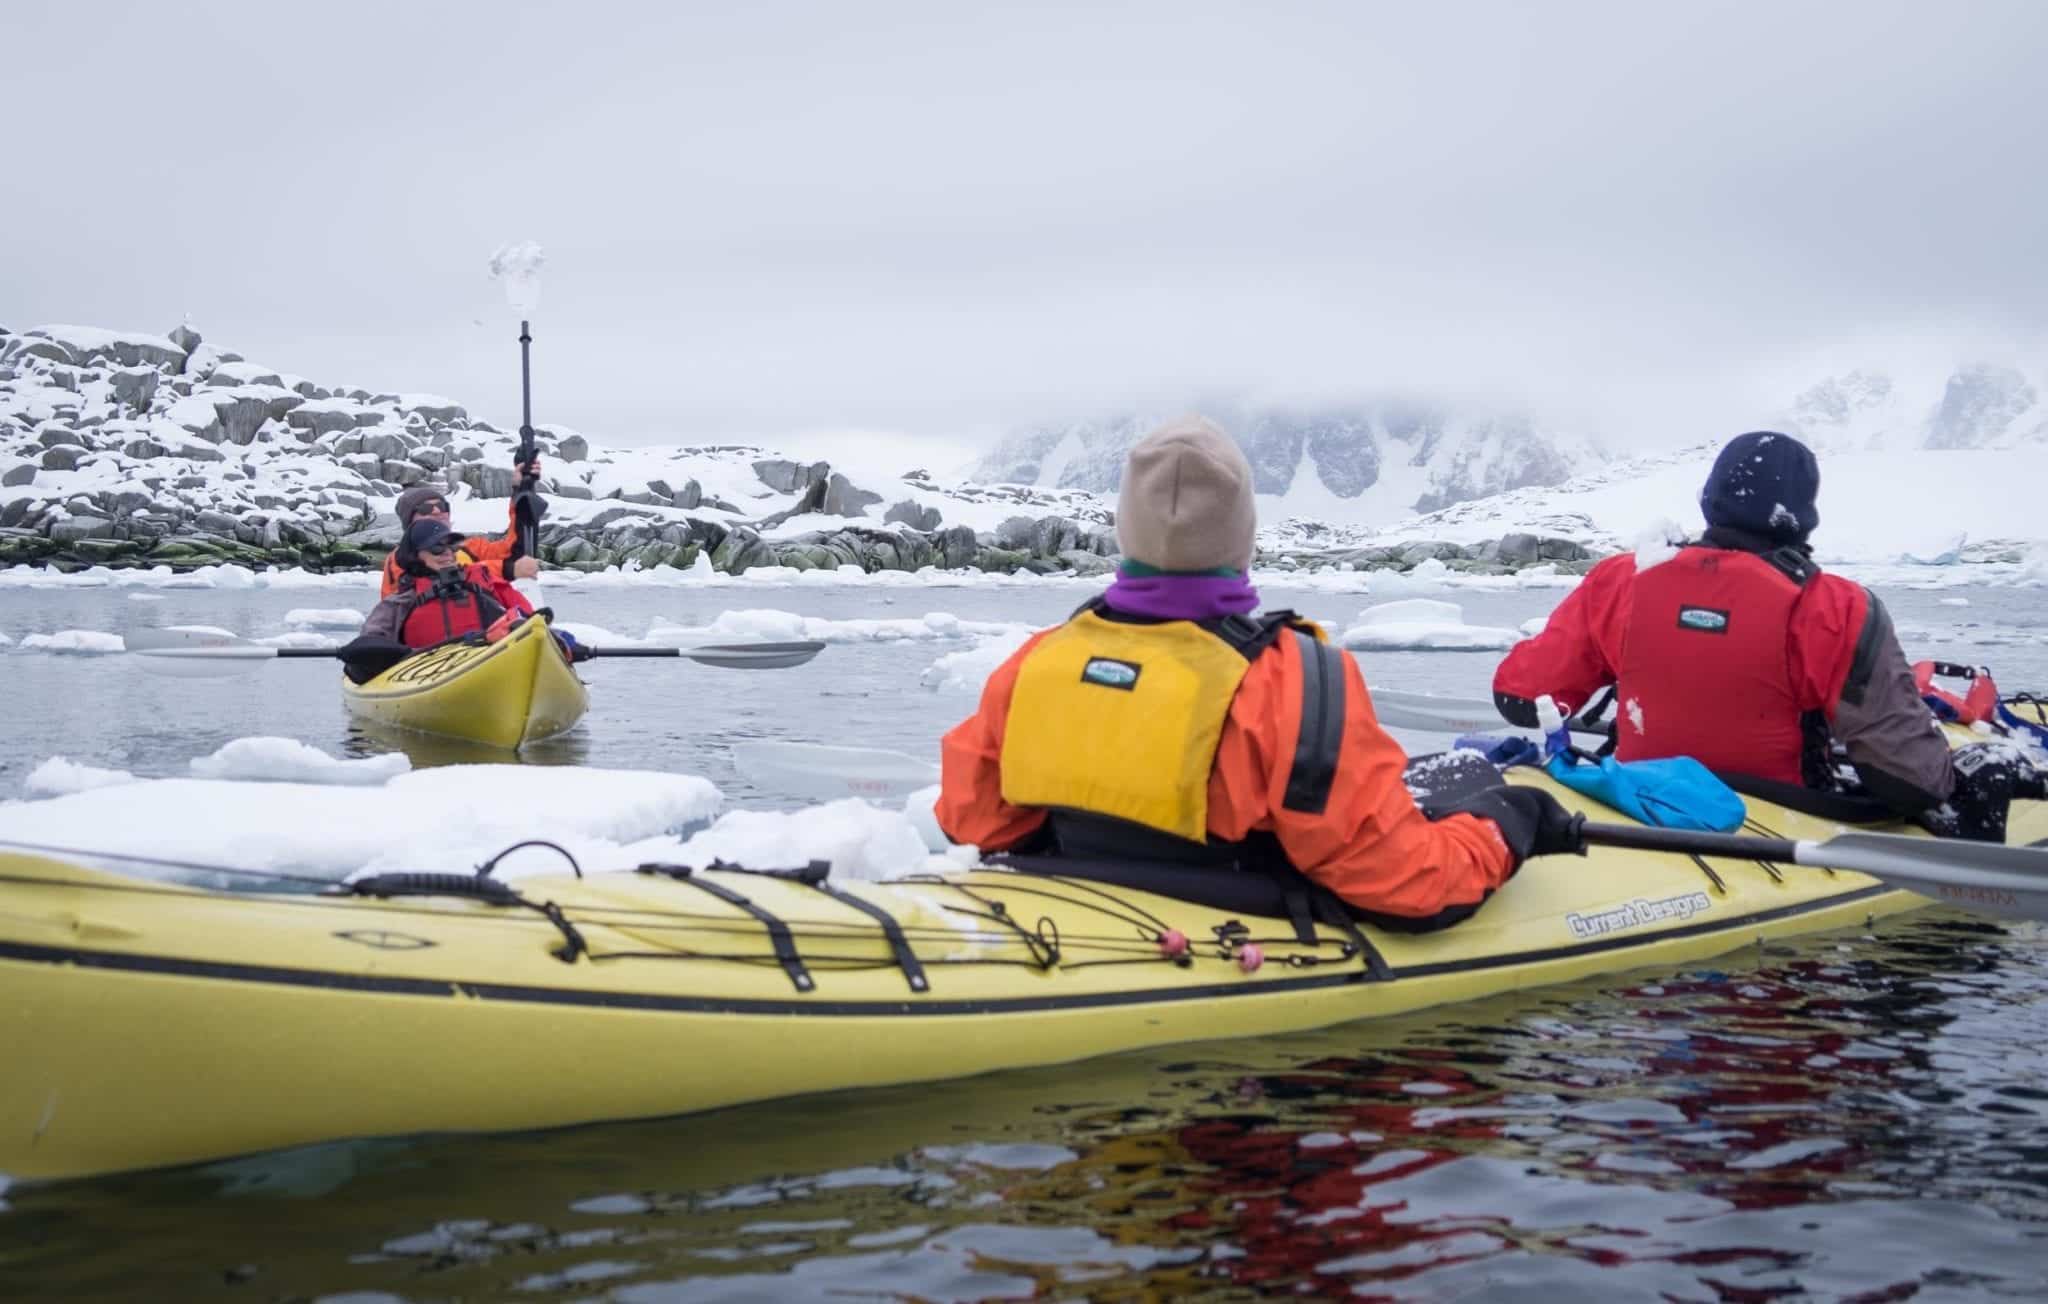
Port Charcot. If you’re on a trip that crosses the Antarctic Circle, you may stop here. Jean-Baptiste Charcot, my favorite Antarctic explorer, landed here with his crew and their pet pig Toby. Port Charcot has lots of brash ice to paddle through. We even had a snowball fight, flinging them with our paddles! I quickly snapped a photo of the fight above.

Paradise Harbour. It lives up to its name — the bay is protected and thus you have the smoothest, most pristine waters, surrounded by mountains on all sides. It was the perfect environment in which to do a primal scream! Paradise Harbour is also home to a cool old Argentine station.

Image via Quark Expeditions

Wilhelmina Bay. More whales than you ever thought could exist in one place. At one point it seemed like every zodiac had their own pod to watch! That was where we had the craziest kayak moment of the trip — where a giant whale came up out of the water, nose first, right in front of us.

And my least favorite spot? Well, don’t expect to kayak on Deception Island. The conditions make it really tough to kayak there, and we had to sit it out. That said, it’s an interesting landing. I got charged by a sea lion.

I beg you: please don’t book kayaking in Antarctica unless you’re 100% committed to it.

Many of the passengers who book Antarctica kayaking don’t understand how much of a commitment they’re making. They don’t realize that they’ll be kayaking twice a day, physically exerting themselves, and missing out on landing time. (One Quark employee told me that this most often happens when people book through travel agents rather than directly with Quark.)

We had 200 passengers on our ship, the Ocean Diamond, and only 16 spots for kayakers. The kayaking spots went extremely quickly — they tend to sell out months in advance. And I can’t tell you how many people on board told me, “You’re kayaking? I’m jealous. I wanted to so badly but it was sold out.”

Another thing: if you’re traveling with your partner and one person really wants to kayak and the other doesn’t, you don’t both have to do it. You’ll make tons of friends and have plenty of time to spend with your partner when you’re on the ship. Let the limited kayaking spots go to people who really want them.

Kayaking in Antarctica isn’t for everyone. And that’s okay. No matter what you do in Antarctica, you’ll be experiencing one of the most remarkable destinations on the planet.


READ NEXT: A Typical Day on an Antarctica Expedition Cruise


Essential Info: I traveled to Antarctica on Quark ExpeditionsCrossing the Circle: Southern Expedition in March 2018. The 2019 voyage starts at $8,995. The kayaking supplement is $995, which includes kayaking throughout the voyage, but starting this summer in the Arctic Quark is offering one-day “paddling excursions” that are better suited for people with less experience who don’t want to kayak every day.

Quark often has sales — I recommend following them on Facebookand checking out their website. Additionally, some people can get deals by flying down to Ushuaia and jumping on a last-minute discounted trip — though this is risky! You never know what will be available. If you’re looking to kayak, book as early as possible, as kayaking slots are limited and sell out quickly.

See my Antarctica packing list for what to wear in Antarctica.

While Quark has Antarctica-specific evacuation coverage for emergencies, you need to have your own travel insurance as well. For my trip to Antarctica, I used World Nomads, which I highly recommend for both Antarctica and elsewhere.

This post is brought to you by Quark Expeditions, who hosted me in full on this trip and covered most of my expenses including the full cost of the expedition, kayaking supplement, two nights’ accommodation in Ushuaia, and round-trip airfare from New York. I paid for all incidentals, staff gratuities, gear excluding the Quark parka, and all expenses in Ushuaia excluding the hotel. All opinions, as always, are my own.

Would you kayak in Antarctica? Share away!

The post Kayaking in Antarctica: Everything You Need to Know appeared first on Adventurous Kate.


from Adventurous Kate https://ift.tt/2O5SQLR

In The Mail: Cobra F-Max Superlite Fairway Metal

  In The Mail: Cobra F-Max Superlite Fairway Metal In the mail for testing this ... Read more.

The post In The Mail: Cobra F-Max Superlite Fairway Metal appeared first on GolfBlogger Golf Blog.


from GolfBlogger Golf Blog https://ift.tt/2NFNt6q

Ryder Cup Match Play Formats

A quick primer on Ryder Cup Match Play: The Ryder Cup consists of Four Ball, ... Read more.

The post Ryder Cup Match Play Formats appeared first on GolfBlogger Golf Blog.


from GolfBlogger Golf Blog https://ift.tt/2NFxiGs

Ryder Cup Wildcard Picks

  I ran across this interesting analysis of the Ryder Cup Wild Card picks from ... Read more.

The post Ryder Cup Wildcard Picks appeared first on GolfBlogger Golf Blog.


from GolfBlogger Golf Blog https://ift.tt/2IcAX8y

Monday, September 24, 2018

Dirt Season

I've now officially transitioned into autumn mode, and this past Friday I kept things dirt-oriented by setting out on the Jones:


On Saturday I did relapse into Fredness a bit by taking a spin on the Renovo, but I did return to the Jones on Sunday for some more fat-tire cyclocrossing:


Along with my son:


This particular three-race series is now over, and I'm impressed that he rousted himself early three Sundays in a row in order to do the bike racing--though the sweet bike did serve as motivation:


If you're outfitting a child of similar age I highly recommend this bike, though if you really want to project your Fredly aspirations onto your kid you can always go for the "Pro" version:

Which is a dangerous thing to do because before you know it you'll be spending $900 on a balance bike:

What Strider put together is wild, maybe a little ridiculous, and stunning to look at. The 12 ST-R, which will be available for sale next month, has a red carbon fiber frame, carbon fork, and carbon wheels. It weighs 5.6 pounds and with 12-inch wheels will fit riders between 18 months and 5 years, Strider says. It will look appropriate in your garage, cozied up against your Specialized Tarmac or Juliana Joplin carbon fiber adult bikes.

Not ridiculous at all!  Scoff if you will, but but a high-quality balance bike is a great investment as it will last for years and your child can ride it well into adulthood.

No, the real irony is that when it comes to balance bikes the wooden ones are the cheapest:


That's now how it's supposed to work:


from Bike Snob NYC https://ift.tt/2xMsfsX

Smithson, Ly Win GAM Junior Invitational Titles

Bradley Smithson of Grand Rapids, Jasmine Ly of Windsor Win GAM Junior Invitational Titles EAST ... Read more.

The post Smithson, Ly Win GAM Junior Invitational Titles appeared first on GolfBlogger Golf Blog.


from GolfBlogger Golf Blog https://ift.tt/2MY0PG3

Ryder Cup Past Results

Here is a list of Ryder Cup Past Results, including the year, venue, score and ... Read more.

The post Ryder Cup Past Results appeared first on GolfBlogger Golf Blog.


from GolfBlogger Golf Blog https://ift.tt/2IaU7Mh

Textiles come in all shapes and sizes at the British Library

As part of London Fashion Week Nabil Nayal hosted his presentation at the British Library on Tuesday 18 September. He is an advocate of ‘research in fashion education and practice’ and has used the collections at the British Library extensively. The image below shows how he used Elizabeth I’s famous Tilbury Speech as inspiration for one of his printed textiles. www.nabilnayal.com The Library Collections are diverse and complex, representing many cultures and comprises of published, written and digital content together with letters photographs, paintings, newspapers, sound recordings, videos, objects and textiles. Textiles are found in all curatorial divisions: Contemporary British; Western Heritage, European and American and most widely in the Asia and African collections. As textile conservator, I have chosen a few of the most beautiful and inspirational objects. Royal MS 12C VIII 1 – Chemise book jacket with the badge and motto of Prince Henry Frederick (1594-1612): red velvet, silver and gold metal thread and seed pearls.  See the item online here.  Or 1234 – Manuscript with blue silk pages and red silk embroidery. Qianlong's Ten Victories: chronicle of ten successful campaigns conducted by the Emperor in 1790. The author is the Emperor himself, and the manuscript contains the Emperor’s own handwriting embroidered on silk. Explore and learn more about this item here. MSS EUR G59 – Large ceremonial, silk brocade bag which housed an ‘Ornamental Letter of Credence, dated 27 Oct 1835, from `Louis Philippe Empereur des Francais' (1773-1850) to Maharaja Ranjit Singh (1780-1839), ruler of the Punjab 1792-1839’. Explore and learn more about this item here. Unfortunately, the above items are all restricted due to their fragile and rare status. Letters of introduction can be written to the curators to request permission to view restricted items. LIZ ROSE, Textile conservator

from Collection Care blog https://ift.tt/2Q0VcIZ

025: What is the “Infinite Banking Concept” (and is this really legit)?

Earlier this year, I started educating myself about something called the Infinite Banking Concept.

There’s a lot that goes into it (not the type of thing I can explain in one paragraph), but in essence, the idea is to rely less on banks and third-party lenders for meeting your financing needs and instead, build your own banking system inside of a whole life insurance policy, where you’ll able to lend the money to yourself, and then pay the money back (with interest) to your policy.

When you borrow money this way and actually pay it back (the same way if you were borrowing it from a conventional lender), you can ultimately keep all of the money you would've otherwise spent on interest by funneling it into your own banking system.

While it sounds like a fairly straightforward concept, there are a lot of considerations that go into it (because in my opinion, it doesn’t necessarily make sense for every person, depending on their financial situation).

In this interview, I talk with M.C. Laubscher – who is an expert in the Infinite Banking Concept. My goal with this conversation was to get more clarity on the pros and cons of this strategy and to figure out what I wasn’t being told by other “financial advisors” who were just trying to sell me a life insurance policy.

Disclaimer: I am not a financial advisor, so please, do not interpret this blog post or this podcast episode as financial advice. You should definitely talk with your own financial advisor to help you decide whether the Infinite Banking Concept is the right fit for your situation.

Links and Resources Mentioned:

Thanks for Listening!

Share your thoughts:

  • Leave a note in the comments section below.
  • Share this episode on Twitter, Facebook or LinkedIn (social sharing buttons below!)

Help out the show:

Thanks again for joining me this week. Until next time!

Right click here and “Save As” to download this episode to your computer.

The post 025: What is the “Infinite Banking Concept” (and is this really legit)? appeared first on REtipster.


from REtipster https://ift.tt/2xCWZNL

Saturday, September 22, 2018

Golf Is Everywhere: Ugly Lamp Edition

Golf is everywhere: I spotted this perfectly hideous golf themed lamp at a local thrift ... Read more.

The post Golf Is Everywhere: Ugly Lamp Edition appeared first on GolfBlogger Golf Blog.


from GolfBlogger Golf Blog https://ift.tt/2OJ691Q

Friday, September 21, 2018

Field Set for 2018 Senior LPGA Championship At French Lick

  Field Set for 2018 Senior LPGA Championship presented by Old National Bank Five World ... Read more.

The post Field Set for 2018 Senior LPGA Championship At French Lick appeared first on GolfBlogger Golf Blog.


from GolfBlogger Golf Blog https://ift.tt/2O7evU0

Golf Themed Mouse and Mousepad

Golf Themed Mouse and Mousepad Ridiculous Golf Item of the Week

The post Golf Themed Mouse and Mousepad appeared first on GolfBlogger Golf Blog.


from GolfBlogger Golf Blog https://ift.tt/2DlHGhF

Timeless Design Is Timeless

Yesterday I set more mundane concerns aside and went for a ride on the Jones:


It was the ideal route for this bike, consisting of some pavement, some singletrack, and some dirt trail:


Now that I've set the tone for the fall, I intend to continue in this vein for the next few months.

Speaking of bikes with chubby tires, Lennard Zinn asked various bike industry people about what they considered to be "came-changing" technology:

("The new ultra-precision titanium mustache combs are game-changing when it comes to post-ride grooming.")

It's worth noting that out of seven (7) people, most of whom were mountain bike types, two (2) of them emphatically said wide tires and rims.  Meanwhile, suspension only came up once, and only in passing.

Think about it.

Or don't, I really don't care.

And in other tech news, it's becoming easier and easier to ignore Interbike, but I made a point to check out James Huang's coverage recently because it's always worthwhile.  The first thing that jumped out at me was this magnesium bike:


Sure, I enjoyed their questionable "pound of lead vs. pound of feathers" marketing approach:


But the real reason I took notice was that we all know Segal bikes were making magnesium bikes years ago:


I don't know if Segal are still making bikes, but US distributor Trish Cohen's website is still up, so make of that what you will.  And to be honest I still find myself thinking about that bike from time to time: light, endearingly ugly, and made of metal, it was in some ways the perfect New York City park racer, and I kind of wish I'd held onto it. (Though I think if you own a magnesium bike and a wood bike you may be taking the alternative frame material thing too far.)

Elsewhere in James Huang's coverage I found myself puzzling over this:


The cleverly named Tacx Radar (it’s a palindrome …) bottle cage can be configured for left-hand or right-hand access. It seems to hold bottles quite securely, too.

"How the hell can a bottle cage be right- or left-handed?," I wondered.  What's next, a right- or left-handed water bottle?  So I went to the website:


The Radar is a side load bottle cage with very good clamping and especially designed to fit small bike frames. You insert and remove your bottle sideways, from either the left or the right side.

I guess how it works is that if you have a tight frame and a big bottle you can yank the bottle out at sort of an angle, which does make sense.  So there you go.

Finally, via a reader, Old Man Budnitz is doing a "gravel grinder" now:


Basically, it has a belt drive and a Rohloff hub:

The trick to the dropbar Rohloff setup, the Ø:G uses the shifters from a set of SRAM Force 22 road hydraulic disc brake levers with their internal ratcheting mechanisms removed to control the internally geared rear hub without a bulky, less ergonomic shifter à la the Gebla Rohbox mod.

I thought Rohbox was that video game my kid plays until I read more about it:


Now I see why Budnitz doesn't include any pictures.

Hey, it may very well be a fantastic bit of tech, but that's still a lot to pay for a bike with the Rohloff equivalent of a Jtek ShiftMate.

As for actual useful information about the bike (tire clearance, bag mounting capability, etc.), I couldn't find any of that over at the Budnitz website, but I did find this video:

The Owner from Budnitz Bicycles on Vimeo.

And what I learned from that is that cool designer-type people ride Budnitzes:


So cool in fact they ride on the opposite side of the road:


One thing you can say for design people is they feel really strongly about design:


The world doesn't need junk, it needs responsible, well-considered, timeless, meaningful design.

You mean like upside-down skulls that say "Fuck Apathy" underneath them in Sharpie?


Timeless indeed.

from Bike Snob NYC https://ift.tt/2PXxFZJ

A Canadian Playlist by Maggie Morrison

My guest writer this week is Canadian pianist, teacher, adjudicator and musicologist Maggie Morrison. Maggie (pictured below) is studying for her doctorate at the University of Toronto, where she is researching the piano music of Canadian composer David L. McIntyre. I asked her what qualities pervade David’s music and what drew her to study the music of Contemporary Canadian composers. Over to Maggie…


When Melanie and I met this past March as adjudicators in Hong Kong, my grandfather was alive. He now rests in the Eternal Garden, a niche cremation wall in Brantford, Ontario.  After his death I began spending every Thursday with my Nana. During one of our Thursdays together, I noticed a hunter green chest tucked away in a corner with the title “J. WRATTEN” printed on the top in big black lettering.

I opened it up and found my great grandfather’s immigration slip from England dated 1913, from the port of Liverpool – the immigration slip!  I hadn’t thought or realized until that moment that my gramps was first generation Canadian. He instilled values that serve me today – work hard, be kind, and get the job done.

My grandpa grew up in the Salvation Army playing the tuba; he encouraged my mom to be a musician as a young girl, driving her to lessons and local Kiwanis competitions.  She is now an established teacher, life coach and mentor; blazing a trail for badass entrepreneurs with her online business The Music Teacher’s Teacher.

I grew up with Boris Berlin’s pedagogy books as a beginner pianist, attended Sharon, Louis and Bram concerts as a little girl, and later blasted Alanis Morissette and The Tragically Hip on my car speakers as a young driver, ripping around southern Ontario.  As a teenager I studied with Dr. E. Gregory Butler who encouraged me (and his entire studio) to learn and perform Canadian pieces every year.  My first advanced piece of Canadian repertoire was Jacques Hetu’s Impromptu Op.70.  I love the freedom that new music brings, the map is a familiar landscape among a different terrain.

I’ve come full circle with my love of Canadian music: I’m focusing on the piano music of David L. McIntyre for my doctorate dissertation at the University of Toronto.  Back in 2011, I asked David to write a piece for me.  We exchanged many emails – he was interested in getting to know me both as a musician and an individual.  He asked me many questions, from favourite colour to country to cuisine.  The piece he wrote for me, “Transmissions”, is now a part of Canada’s Royal Conservatory of Music syllabus for the Diploma level.

David’s music is completely captivating.  His compositional style is very pianistic; he himself is a pianist.  His music for beginners is full of humour and personality.  Listening to the Sun and A Small Band of Smart Rodents are two of my favourites. There is often a rhythmic force – a pulse, a pattern that drives his music.  In Transmissions, David’s compositional style ping pongs between two main focuses: rhythm and melody.  The first section pushes forward with intense rhythmic drive – from the first bar McIntyre doesn’t spare a second – it begins with sixteenth notes in both hands chromatically crashing to the second bar where an intense motive then takes over.  There is an element of satirical humour heard here, with an almost Prokofiev-like approach. The feeling of breathlessness and intensity doesn’t let up until a few minutes into the piece.  The contrasting section is dreamy and melodic – highly pianistic and soulful writing – using the lowest and highest ends of the piano simultaneously, featuring languid rhythms in a bluesy section and ostinato in the bass.

David’s inspiration for this piece came from the first telephone call ever made by Alexander Graham Bell from Paris (Ontario) to Brantford, about 15 kilometres away.  David thought it was interesting that I was originally from Paris, but was premiering this piece for a fundraising concert in Brantford.  Thus blossomed his idea of a transmission – a wave of energy through technology, from the earth to the stars (or satellite) and back.

We often don’t know how our environments influence us. Sometimes it’s very clear, sometimes it is less obvious.  I am proud to be the granddaughter of a man who valued music.

Here is my Playlist of Canadian music for you to explore and enjoy:

  • The Tragically Hip – Bobcaygeon
  • Alanis Morrisette – Ironic
  • David L. McIntyre – Transmissions, for Maggie
  • Alexina Louie – Scenes from a Jade Terrace
  • Francois Morel – Etude de Sonorite, No.2
  • Heather Schmidt – Nebula

The following video comes from one of my Bachelor’s Degree performances at The Cleveland Institute of Music in 2012.


My Publications:

For much more information about how to practice piano repertoire, take a look at my two-book piano course, Play it again: PIANO (Schott). Covering a huge array of styles and genres, 49 progressive pieces from approximately Grade 1 – 8 level are featured, with at least two pages of practice tips for every piece. A convenient and beneficial course for students of any age, with or without a teacher, and it can also be used alongside piano examination syllabuses too.

You can find out more about my other piano publications and compositions here.


from Melanie Spanswick https://ift.tt/2xCysrj